
A useful way through
- List the purpose of the images and the rooms to be shown. Separate a design portfolio, property listing and documentary record: the same retouching or styling choices may be inappropriate for a different purpose. Identify the person who can approve access and publication.
- Make a viewpoint plan. Give each proposed image a room, approximate camera position, direction and question it should answer. Note mirrors, windows, occupied areas and personal objects that need attention. Ask the photographer to review what is achievable on site.
- Agree preparation and permissions. Decide who moves objects, who may appear, what must remain accurate and how private information is removed from view. Plan access times with occupants rather than assuming a booked room is empty or cleared for publication.
- Review a representative selection against the shot list. Check that labels identify the right rooms, the agreed features are shown, edits fit the stated purpose and exports match the destination. Keep the photographer’s credit and licence with the approved files.
Read the map as text
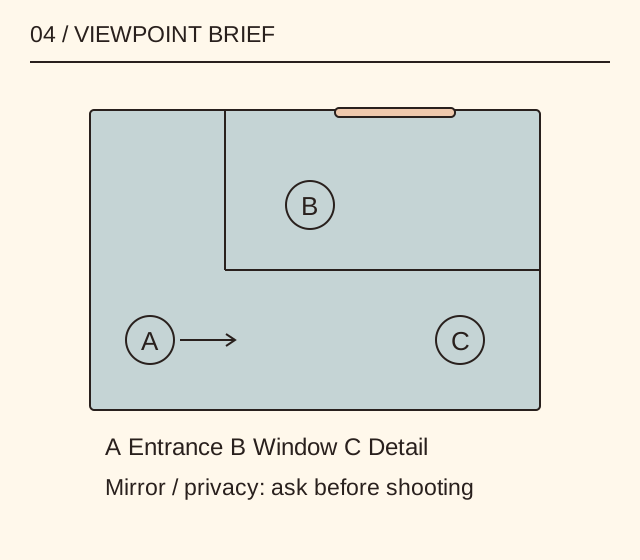
04 / VIEWPOINT BRIEF · A · B · C · A Entrance B Window C Detail · Mirror / privacy: ask before shooting
- View A
- View B
- View C
- Delivery
Put it into practice
For an illustrative studio interior, view A shows the entrance and circulation, view B shows the main work surface and view C documents a detail. A mirror in view B reflects a private noticeboard. The team resolves the privacy issue before the shot rather than treating retouching as automatic permission to publish everything in the room.
Illustrative example, not a reported client project or test.
Your take-away checklist
Brief a room photography session with a viewpoint plan
- □ View A: ____________________
- □ View B: ____________________
- □ View C: ____________________
- □ Delivery: ____________________
Before you act
Obtain the appropriate access, image and publication permissions. This is a commissioning procedure, not a representation that a property or photograph has been inspected by MichaelT.
A completed example record
This is the illustrative case above. Download the blank version to record your own task.
- View A
- Entrance → work areaExplains the route
- View B
- Work area → windowMirror and private notices reviewed
- View C
- Material detailPurpose and crop agreed
- Delivery
- Room-view-version filenamesApproved selection and credit retained
A preparation list
Access contact; room availability; objects to move; cleaning or styling responsibilities; people in frame; sensitive documents; equipment restrictions; approval contact. Keep precise instructions close to the viewpoint plan.
Review edits in context
Ask what has changed: exposure, colour, perspective or content. A change that helps a portfolio image look tidy might misrepresent a factual condition record. Resolve the intended use before authorising substantial alterations.
Sources & context
The earlier page, Find The Best Architectural Photography Services in Melbourne, was published 2022-09-13 under the Maria Baldwin byline. This guide develops its subject into a new procedure and worked example by MichaelT editorial.